Parking lot cemeteries in OldInsuranceMaps
This page provides basic information and links required to select a city and download maps for Assignment 03 using OldInsuranceMaps. If you want to use the maps georeferenced from OldInsuranceMaps, you have to georeference at least 4 maps from this atlas of Somerville. If you want to pick another city in the U.S., follow instructions in the ArcGIS Pro tutorial.
Step 1: Create an account
Navigate to https://oldinsurancemaps.net and create an account. This part’s really easy!
Step 2: Georeference maps
OldInsuranceMaps has a great tutorial for getting started with the georeferencing process. Check it out here. There are lots of georeferenced maps available in OldInsuranceMaps. You could consider using these for your final project, but for this assignment, you may only use georeferenced maps from this 1900 Sanborn atlas of Somerville. OldInsuranceMaps follows a really specific workflow for georeferencing, which was purpose-built for Sanborn atlases. I’ve done the first step of document preparation—where you load each image and specify how many maps it contains—for you.
Since I’ve prepared the maps, you can pick up right away with georeferencing layers and masking them.
Georeferencing layers
First, follow this link to open the 1900 Sanborn atlas in OldInsuranceMaps, and unfold the “Prepared” header:
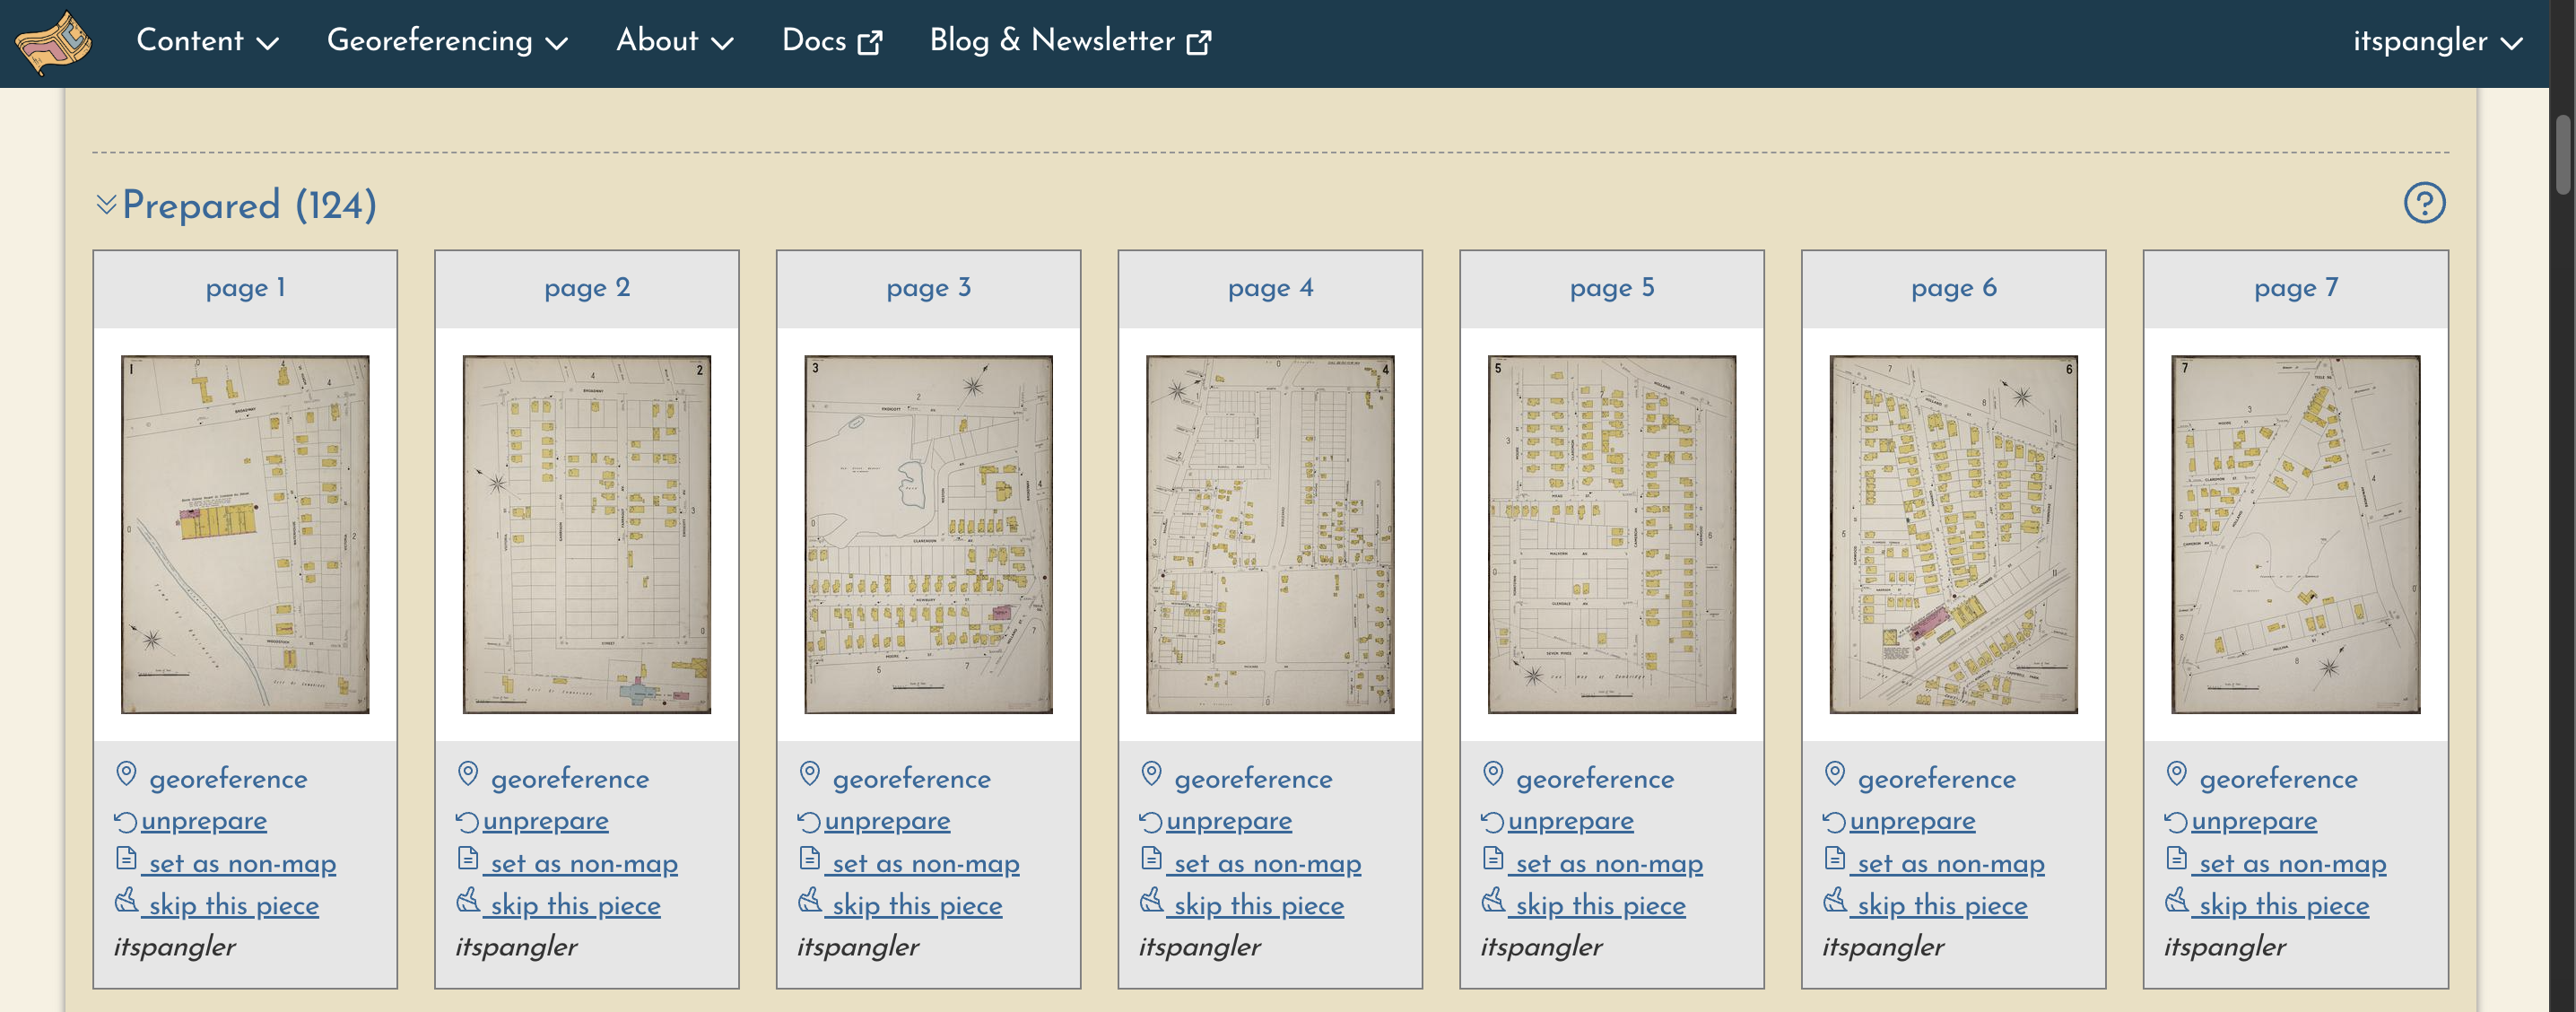
Take a look at these maps. Each map in the gallery corresponds to one map in a page in an urban atlas.
You might notice some maps are listed, e.g., as “84 [1]” and “84 [2]”. This means the maps were split during the preparation stage. “Splitting” happens when an image contains multiple maps, which is common among Sanborn maps and other high-fidelity urban atlases.
Everyone should georeference a few of these maps. In order to avoid having multiple people georeference the same maps, go ahead and claim a few pages to georeference from the Google Sheet embedded below. To “claim” a page, just write your name in the “Your name” column (in this demo, I’m using “page 1”):
Once you’ve chosen about 4 maps, click “geoference,” and a new page will open up:
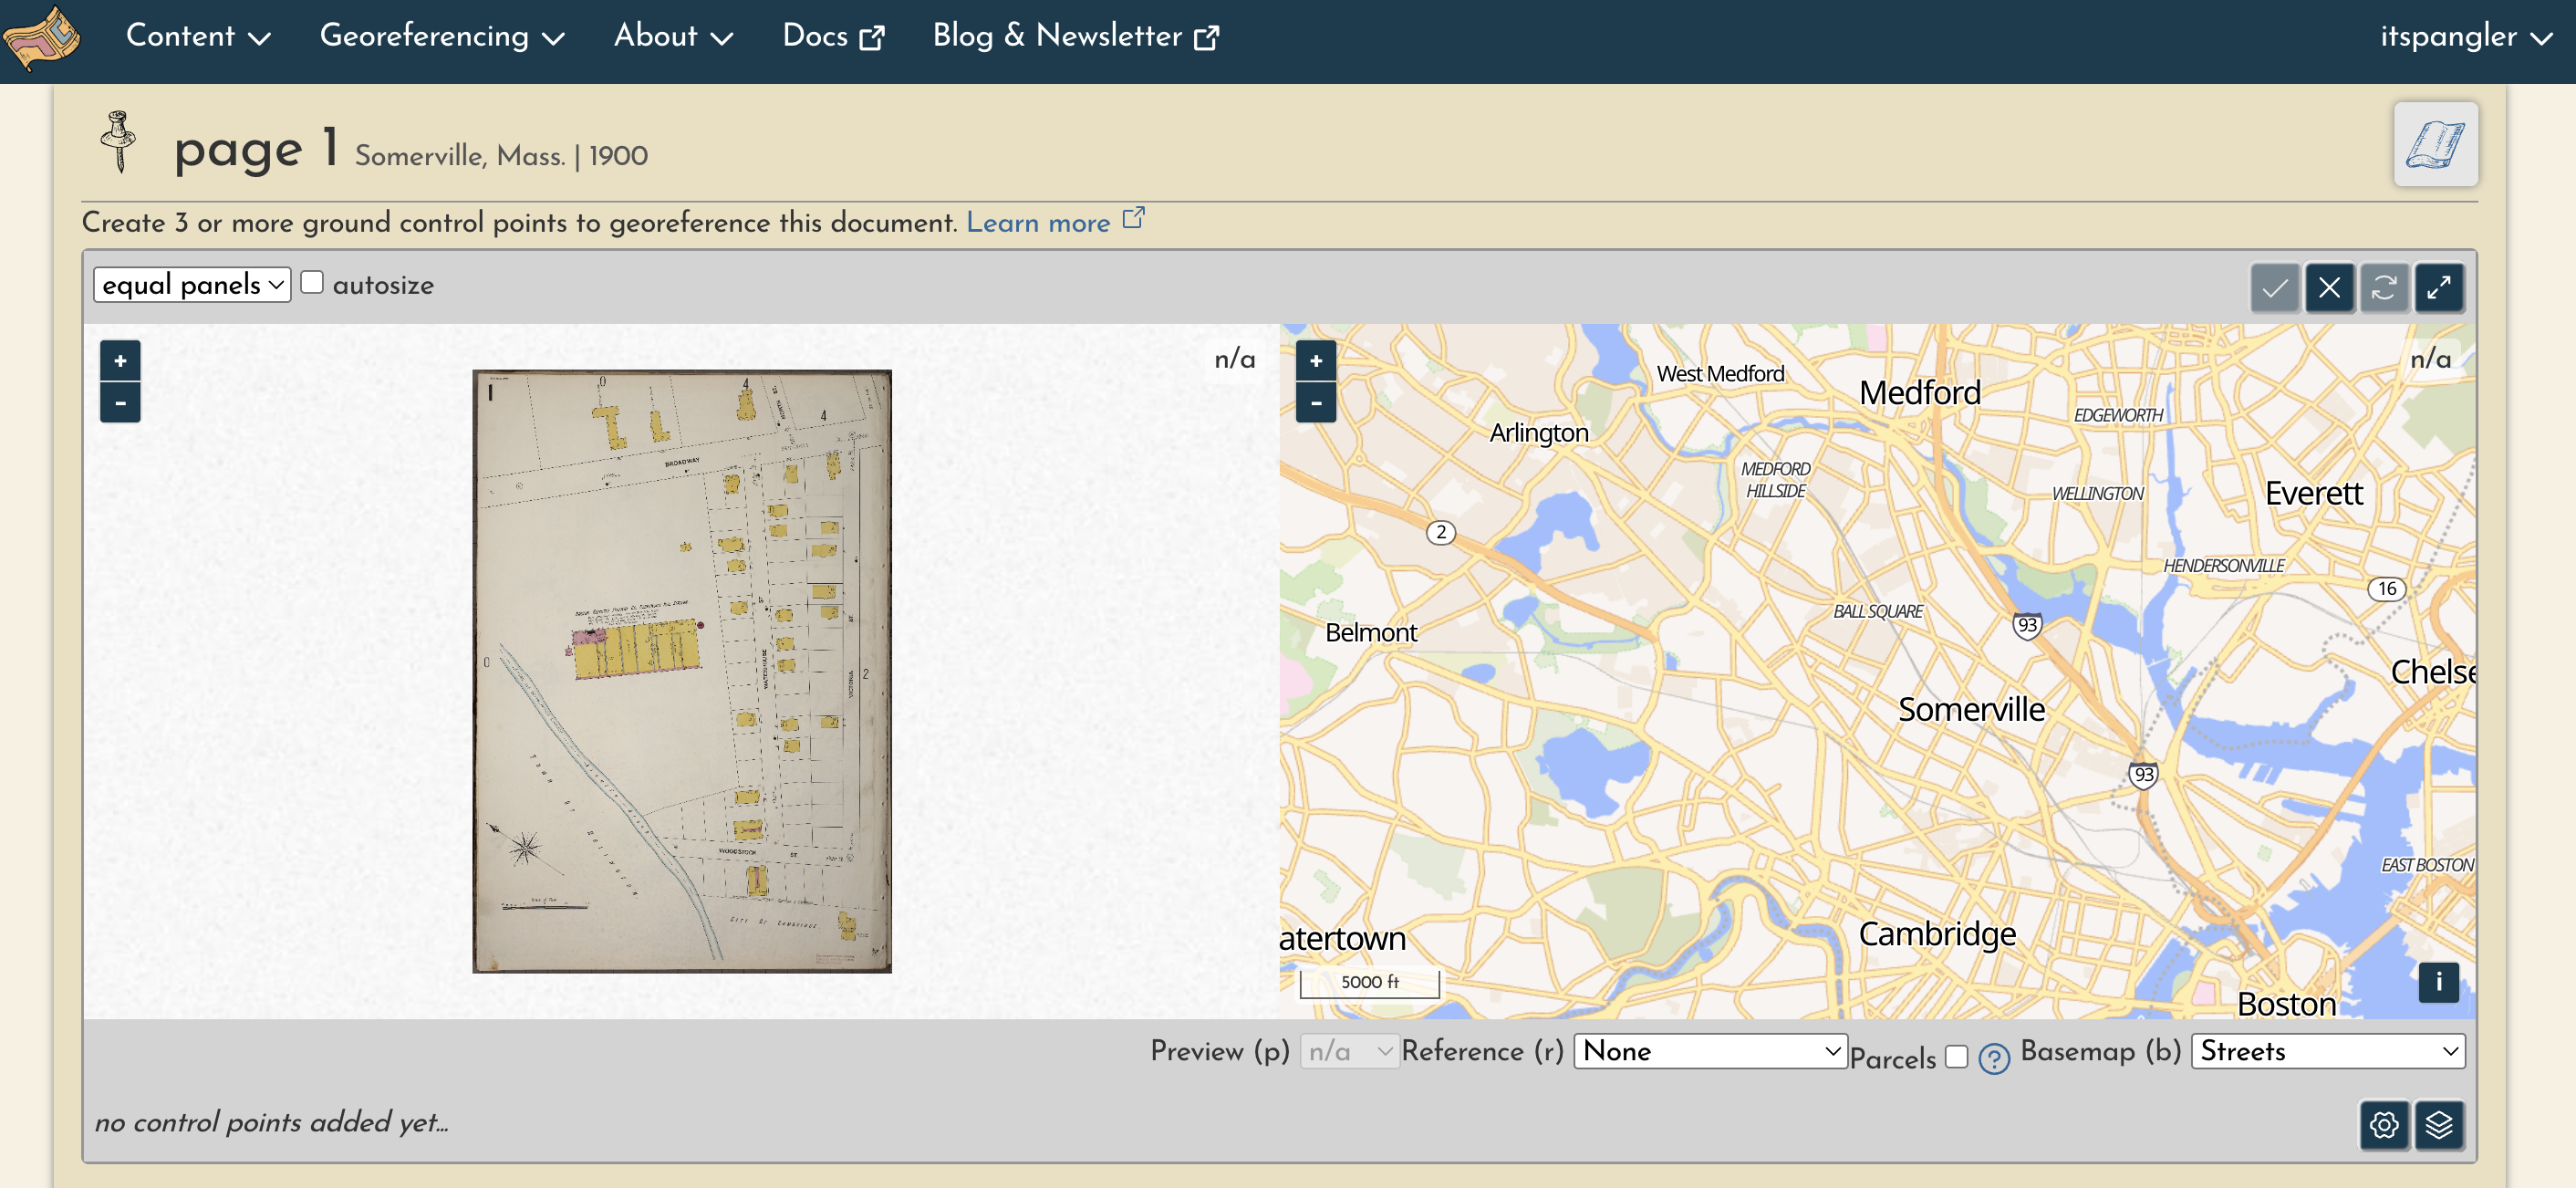
You can follow these instructions to place control points.
Some general notes from me:
- The “key map” may appear as a semitransparent overlay in the modern map view. This can be useful for locating where the individual sheet is supposed to go (the page number at the top left- or right-hand corner of the individual map sheet will correspond with numbers on the key map overlay)
- You can toggle overlays on and off, including the key map and parcel boundaries. Parcel boundaries are helpful for “snapping” points!
- Once you’ve placed 3 points—the minimum number of points required to georeference a map—a semitransparent overlay of the map will appear
And, regarding control points themselves:
- Use street corners!
- Distribute your control points widely throughout the map (as opposed to putting them all in one section of the map)
- If you need to move a control point, simply click and drag it
- If you need to delete a control point, click on it and press
d(or select it from the dropdown list at the bottom of the screen and click the trash can)
When you are done georeferencing your map, click the checkmark.
Masking layers
In OldInsuranceMaps, we need to georeference everything in the atlas before we start masking. We might not get to that during class, but you can return to this later if you want: there is a great tutorial for masking in the OldInsuranceMaps documentation.
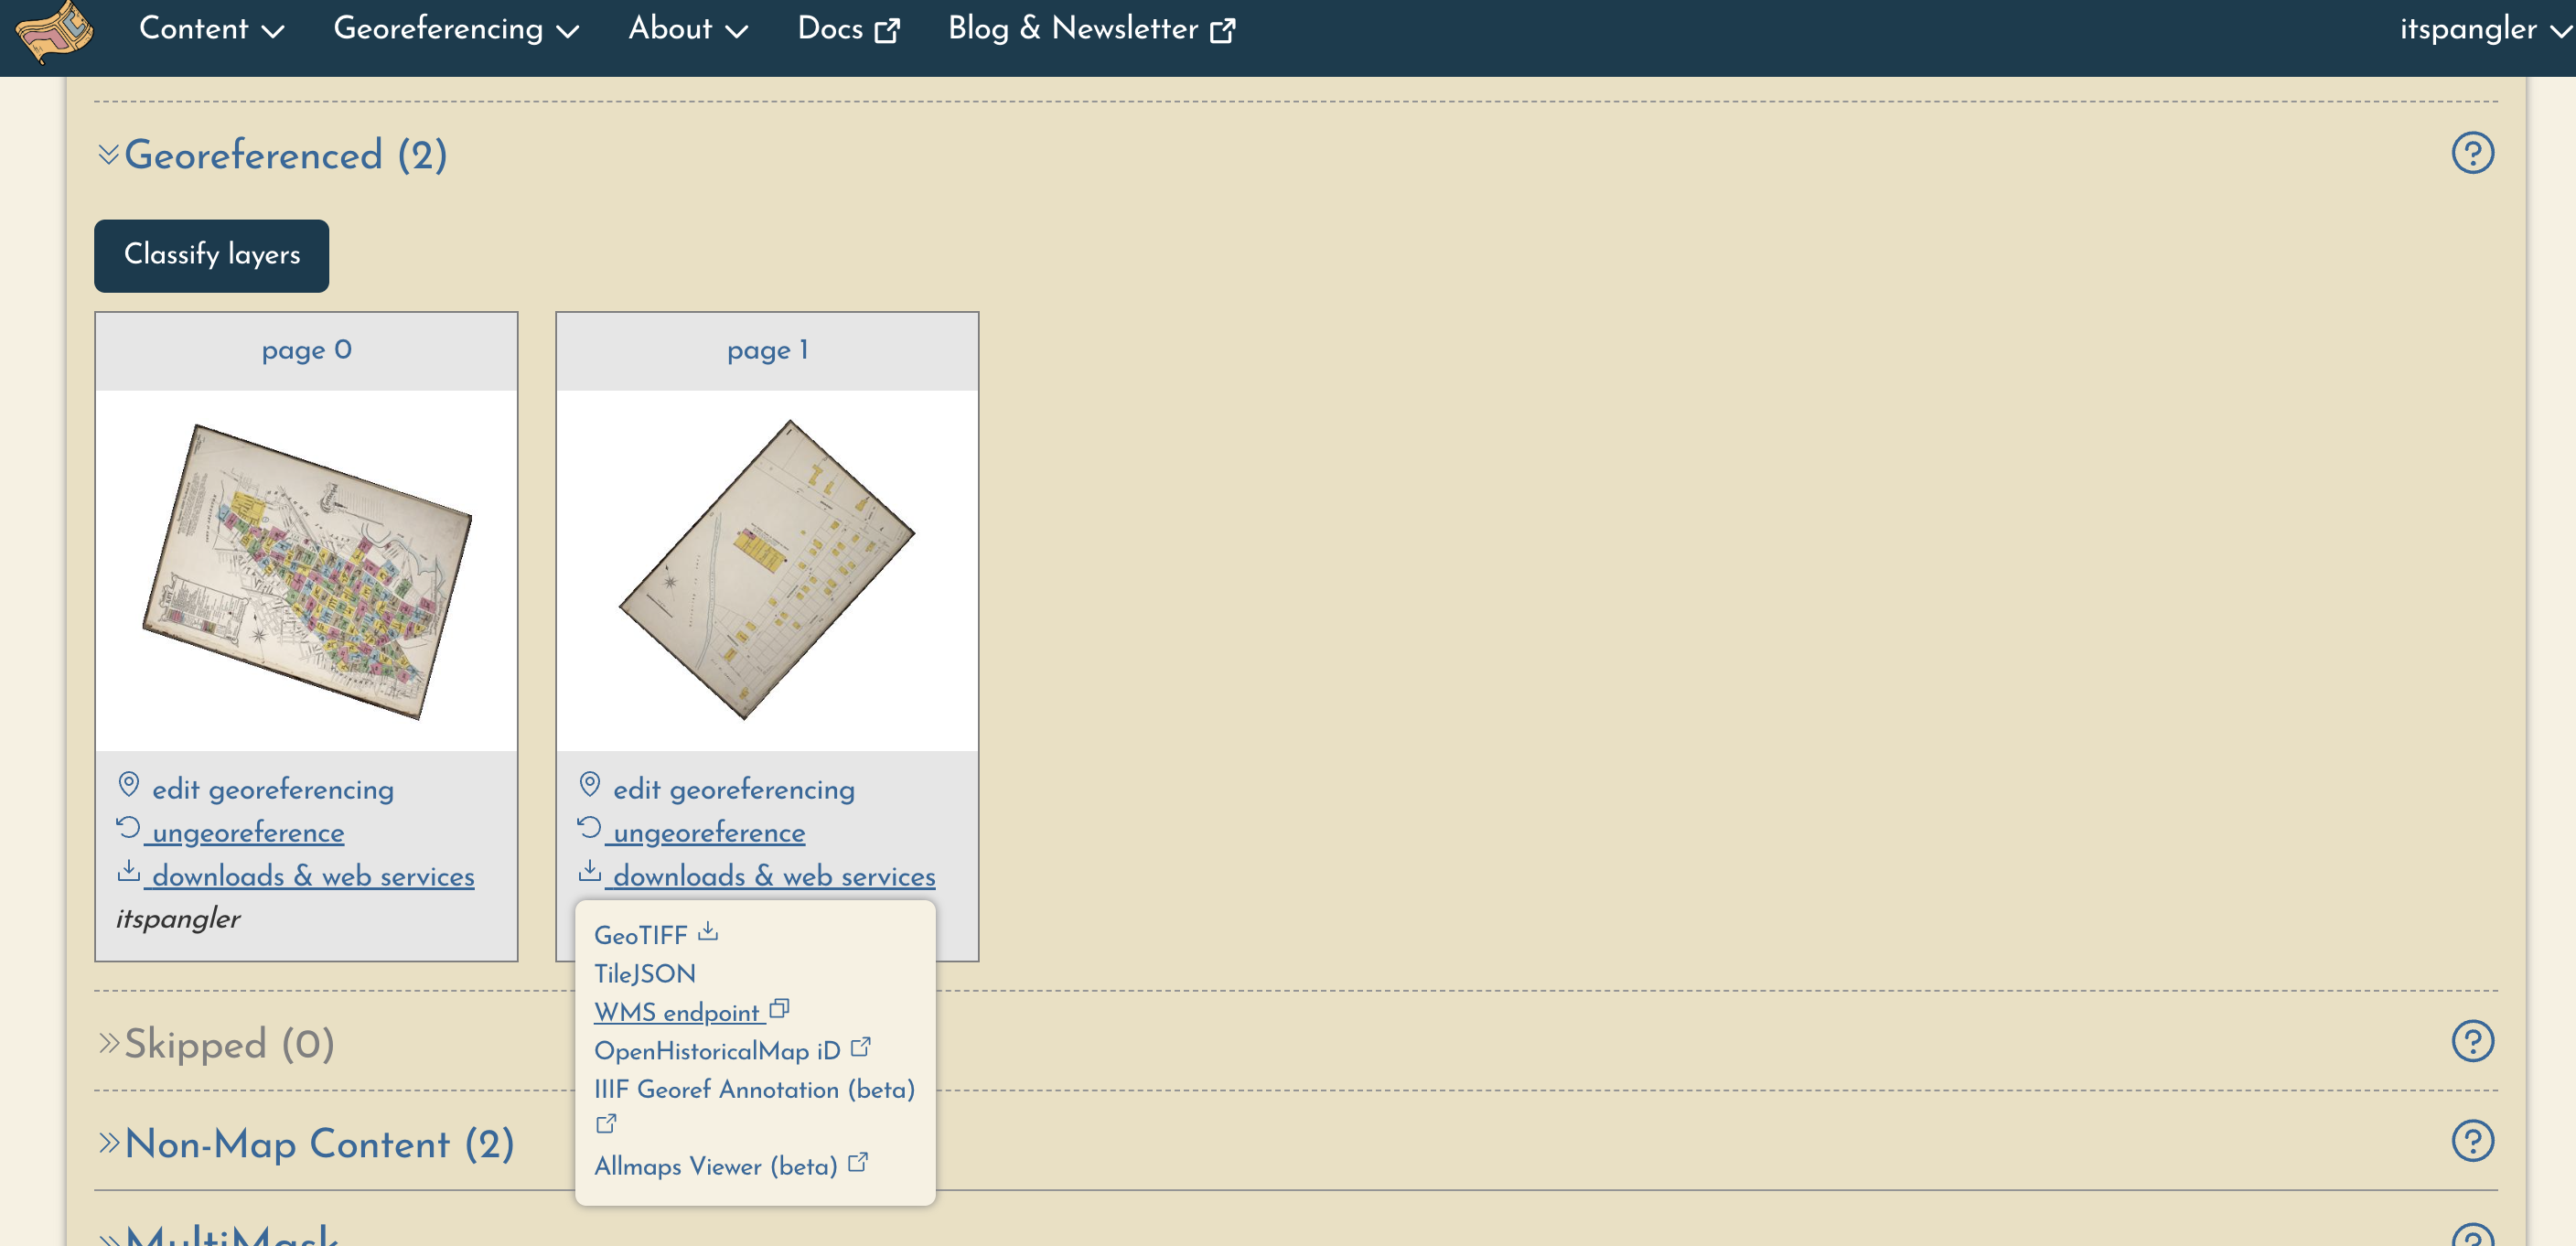
Step 3: Download GeoTIFFs
When you’ve georeferenced your maps, you can download them as GeoTIFFs (a common format for spatial raster data) by unfolding the “Georeferenced” header, clicking “downloads & web services,” and choosing “GeoTIFF.”
Before you proceed to the next step in Assignment 03, ensure you have at least 4 georeferenced GeoTIFFs for Somerville loaded in ArcGIS Pro. They should form a continuous area!
Also make sure they are loaded into ArcGIS Pro. You can load your GeoTIFFs by simply drag-and-dropping them into ArcGIS Pro’s map view, or by using the “Add Data” button in the “Map” tab of the Ribbon.